Installing CA connectors
Installation requirements
To install a CA connector, the following requirements must be satisfied:
-
An SCM account and MRAO administrator permissions
-
Administrator permissions for the CA
-
Microsoft Windows Server 2016, 2019, or 2022 (64-bit) and local admin permissions to install the CA connector
-
Hardware:
-
CPU — 1.4GHz 64-bit or 32-bit (minimum)
-
RAM — 2 GB (minimum)
-
-
Internet access:
-
Outbound network access to
https://cbcc.enterprise.sectigo.comon TCP port443 -
Outbound network access to
https://dist.sectigo.comon TCP port443 -
Outbound network access to the appropriate SCM instance on TCP port
443:-
https://cert-manager.com -
https://hard.cert-manager.com -
https://eu.cert-manager.com
-
-
CA requirements
In addition to the general prerequisites, there are additional requirements that must be met depending on which CA you are using.
The following requirements must be met before using a CA connector with ACM:
-
You have an active AWS account with a private CA.
-
You have configured an AWS user to represent the CA connector.
-
This user must be provided with at least the following permissions:
-
IssueCertificate,GetCertificate,GetCertificateAuthorityCertificate,RevokeCertificate, andDescribeCertificateAuthorityfor the specific CAs being used -
ListCertificateAuthoritiesfor all CAsFor information about configuring ACM access permissions, see Identity and Access Management for AWS Certificate Manager Private Certificate Authority.
-
-
You have this user’s
aws_access_key_idandaws_secret_access_keyFor information about AWS access key IDs and secret access keys, see Understanding and getting your AWS credentials.
-
The following requirements must be met before using a CA connector with the DigiCert CA:
-
You have an active DigiCert account with validated organizations and domains.
SCM shows the validation status of your organization and will not enroll certificates if the organization is not valid. SCM does not show the validation status of your domains and will allow enrollment to proceed but the order requires that the DCV is then completed in DigiCert. -
You have configured a DigiCert user to represent the CA connector.
-
This user must have the Manager or Administrator role.
-
This user must be linked to a DigiCert API key with at least the following permissions:
-
view_organizations -
manage_orders -
place_orders -
view_orders -
manage_requests -
review_requests -
create_longer_validity_orderThis API key must be saved for use when configuring the CA connector. For information about generating DigiCert API keys, see Generate an API key.
-
-
The following requirements must be met before using a CA connector with the Entrust CA:
-
You have an active Entrust account with validated organizations and domains.
SCM shows the validation status of your organization and will not enroll certificates if the organization is not valid. SCM does not show the validation status of your domains and will allow enrollment to proceed but the order requires that the DCV is then completed in Entrust. -
You have configured an Entrust user with an active Entrust certificate to represent the CA connector.
-
This user must have the administrator role.
-
This user’s certificate must be linked to an Entrust API key.
This API key must be saved for use when configuring the CA connector. For information about generating Entrust API keys, see Adding and editing an API key.
-
The following requirements must be met before using a CA connector with GCP CA Service:
-
You have an active GCP account with an Enterprise tier CA.
-
You have configured a GCP service account to represent the CA connector.
-
This account must be provided with at least the following permissions:
-
privateca.caPools.get,privateca.caPools.list,privateca.certificateAuthorities.get,privateca.certificateAuthorities.list,privateca.certificates.create,privateca.certificates.get,privateca.certificates.update,privateca.certificateTemplates.get,privateca.certificateTemplates.list,privateca.certificateTemplates.useFor information about GCPCAS Identity and Access Management roles, see Permissions and roles.
-
-
You have created a service account key.
For information about GCP service account keys, see Create and manage service account keys.
-
The following requirements must be met before using a CA connector with the Microsoft CA:
-
You have installed Active Directory and configured the Certificate Services role as an Enterprise CA.
-
The machine that the CA connector is installed on must be granted the following permissions on the CA you are issuing certificates from:
-
Manage CA
-
Issue and Manage Certificates
-
-
An Enrollment Agent (Computer) template or its duplicate has been added to the CA.
-
The machine that the CA connector is installed on is added to the template with the following permissions:
-
Read
-
Enroll
-
-
Add a CA connector to SCM
-
Navigate to and click the Add icon.
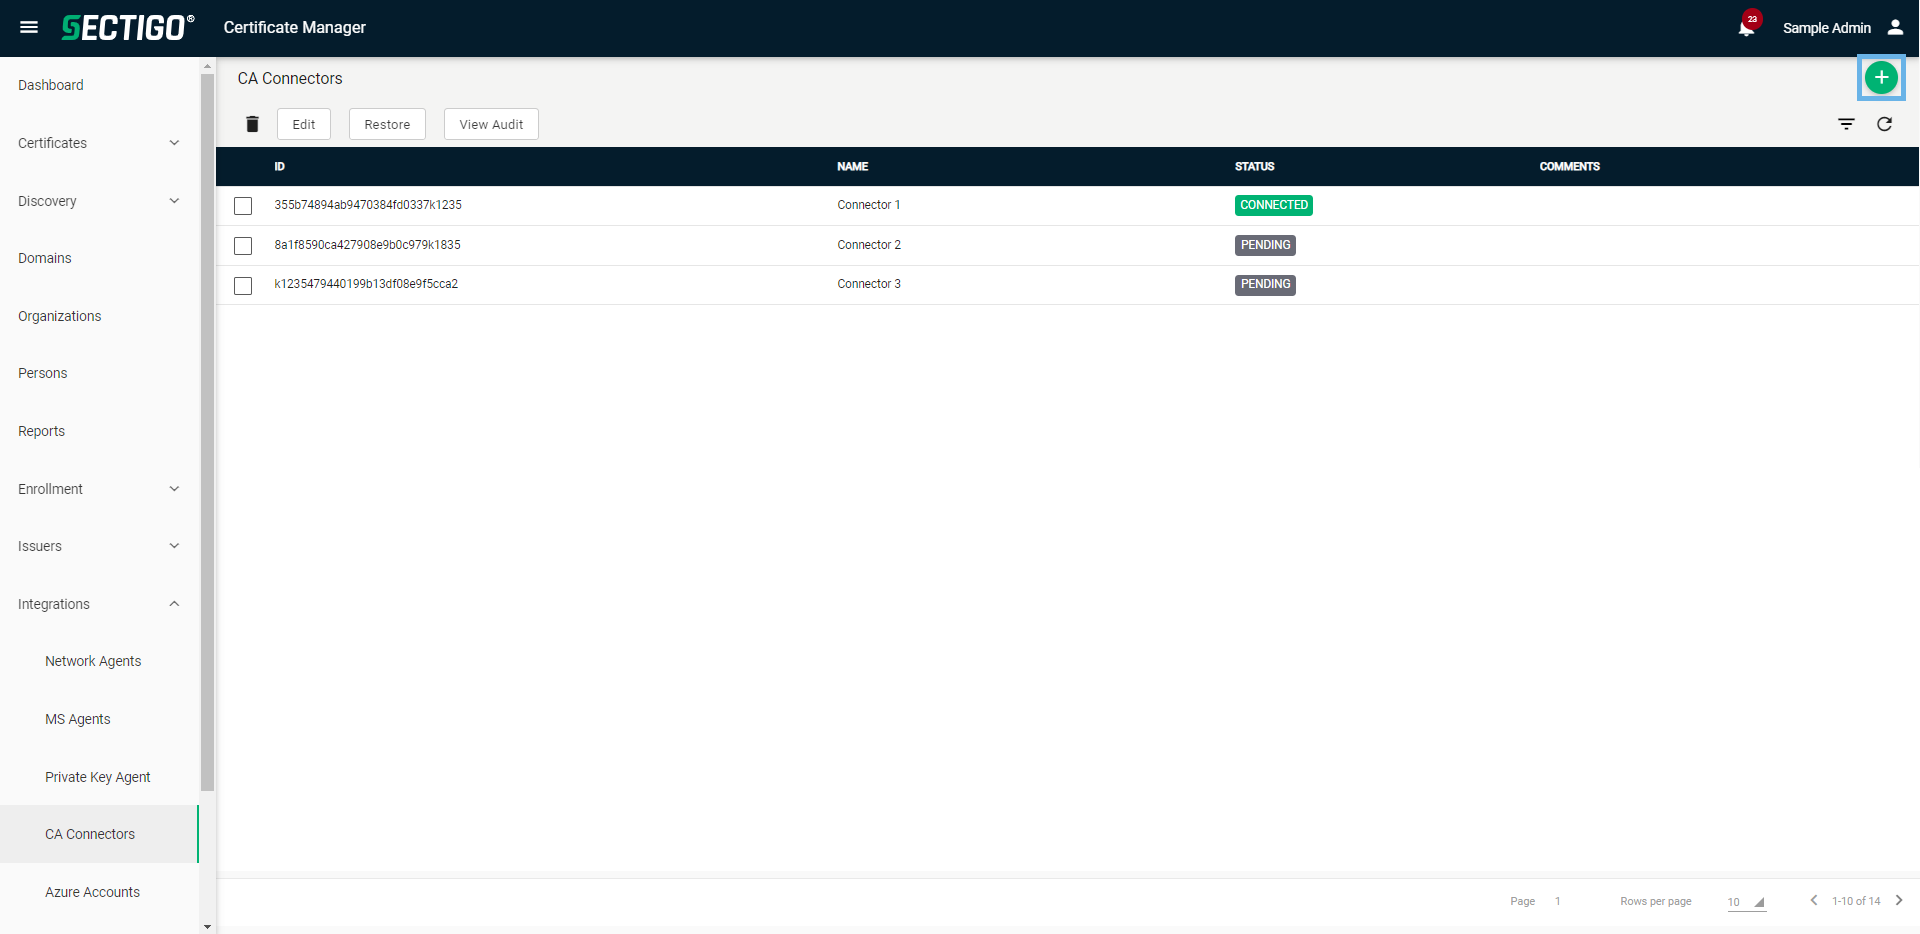
-
In the Add CA Connector dialog, provide a name to help identify the connector.
-
(Optional) Provide comments with additional details about the connector.
-
Click Next.
-
Copy the installation token for use during installation.
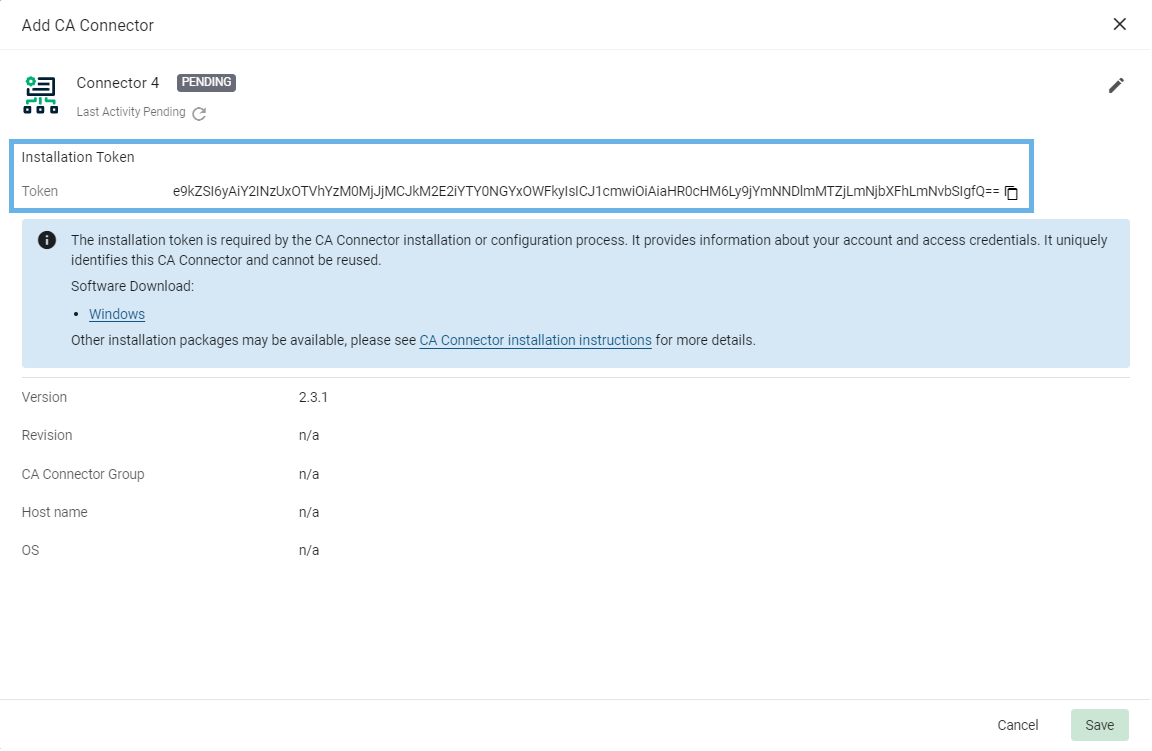
If your installation fails, subsequent attempts require the use of a new registration token. -
Click the Windows installation package link.
-
Click Save.
The connector should now be listed on the CA Connectors page with a status of Pending.
Install a CA connector
-
(Optional) If required, move the
SectigoCBCS.msifile to the CA connector machine. -
Right-click
SectigoCBCS.msiand click Install. -
In the setup wizard, click Next.
-
Read the EULA, select I accept the terms in the License Agreement, and click Next.
-
(Optional) Specify an installation location.
If no destination folder is selected, the CA connector and library will be installed in C:\Program Files\Sectigo Limited\SectigoCBCS. -
Click Next, and paste the connector installation token.
If needed, you can retrieve the installation token from the Edit CA Connector dialog for your connector. -
Click Next.
-
In the Proxy Settings window, select Direct Internet connection (no proxy), or select Manual proxy configuration and enter your configuration details based on the information provided in the following table.
Field Description Address
The IP address or the DNS name of the proxy server.
Port
The listening port of the proxy server.
Username
The username used to connect to the proxy server.
Password
The password used to connect to the proxy server.
Click Test Connection to confirm your connection. -
Click Install.
-
Click Yes to allow the installation to complete on the server.
-
Click Finish.
The application’s configuration and log files are stored in C:\ProgramData\Sectigo Limited\SectigoCBCS.
The connector should now be listed on the CA Connectors page with a status of Connected.
-
Open the Windows command prompt.
-
In the command line, navigate to the download location of the installation package.
-
Modify the installation command as needed.
msiexec.exe /i /q SectigoCBS.msi TOKEN= PROXY_TYPE= PROXY_ADDR= PROXY_PORT= PROXY_USER= PROXY_PASSWORD=Unused options must be removed from the command. The command options are outlined in the following table.
Option Description /iInitiates installation of the agent through the bootstrap application.
/qRuns the installation in silent mode so no interaction is required.
TOKENThe mandatory installation token.
PROXY_TYPEIndicates whether you are using a proxy server.
-
1(Yes) -
0(No)
PROXY_ADDRThe hostname or IP address of your proxy server.
This option is required if you are using a proxy server.
PROXY_PORTThe port number used by your proxy server.
This option is required if you are using a proxy server.
PROXY_USERThe username for accessing the proxy server.
This option is required if your proxy server is configured to use credentials.
PROXY_PASSWORDThe password for accessing the proxy server if configured to use credentials.
This option is required if your proxy server is configured to use credentials.
-
-
Run the modified installation command.
The application’s configuration and log files are stored in C:\ProgramData\Sectigo Limited\SectigoCBCS.
The connector should now be listed on the CA Connectors page with a status of Connected.
Configure a CA connector
Each CA has specific configuration instructions that must be completed once the CA connector is installed.
-
In a command prompt window, navigate to the CA connector install location.
-
Create a new backend.
sectigo-cbcs.exe backend add -name <backend_name> -type acmpca -accesskeyid <key_id> -secretaccesskey <secret_access_key> -region <region>The command options are outlined in the following table.
Option Description nameThe name used to represent the CA backend.
typeThe type of CA that is being connected to.
For ACM the value must be
acmpca.accesskeyidThe AWS access key ID generated when adding a user to AWS.
secretaccesskeyThe AWS secret access key generated when adding a user to AWS.
regionThe region specified during CA creation.
Sample commandsectigo-cbcs.exe backend add -name test-acmpca -type acmpca -accesskeyid AKIAIOSFODNN7EXAMPLE -secretaccesskey wJalrXUtnFEMI/K7MDENG/bPxRfiCYEXAMPLEKEY -region us-east-1
-
In a command prompt window, navigate to the CA connector install location.
-
Create a new backend.
sectigo-cbcs.exe backend add -name <backend_name> -type digicert -apikey <digicert_api_key>The command options are outlined in the following table.
Option Description nameThe name used to represent the CA backend.
typeThe type of CA that is being connected to.
For DigiCert the value must be
digicert.apikeyThe DigiCert API key.
Sample commandsectigo-cbcs.exe backend add -name DigiCertCA -type digicert -apikey 49ca638f-ec73-40fa-a6f6-6a85e997a5a7
-
In a command prompt window, navigate to the CA connector install location.
-
Create a new backend.
sectigo-cbcs.exe backend add -name <backend_name> -type entrust -username <username> -apikey <entrust_api_key> -cert <path_to_user_certificate> -key <path_to_user_certificate_private_key>The command options are outlined in the following table.
Option Description nameThe name used to represent the CA backend.
typeThe type of CA that is being connected to.
For Entrust the value must be
entrust.usernameThe username given on Entrust Enterprise UI.
apikeyAPI key that was generated.
certThe path to the user’s active Entrust certificate.
keyThe path to the private key that corresponds to the active Entrust certificate.
Sample commandsectigo-cbcs.exe backend add -name EntrustCA -type entrust -username SampleAdminUser -apikey 49ca638f-ec73-40fa-a6f6-6a85e997a5a7 -cert C:/Users/sampleuser/Downloads/authfile.cer -key C:/Users/sampleuser/Downloads/myprivatekey.pkcs8
-
(Optional) Delete the
certandkeyfiles.All required information is copied and encrypted from these files during the creation of the backend CA.
-
In a command prompt window, navigate to the CA connector install location.
-
Create a new backend.
sectigo-cbcs.exe backend add -name <backend_name> -type gcpcas -project <project_id> -location <location> -key <path_to_key_file>The command options are outlined in the following table.
Option Description nameThe name used to represent the CA backend.
typeThe type of CA that is being connected to.
For GCP CA Service the value must be
gcpcas.projectThe GCP Project ID.
locationThe location specified during CA creation.
keyThe path to the service account key
.jsonfile.Sample commandsectigo-cbcs.exe backend add -name GoogleCA -type gcpcas -project private-ca-342871 -location us-east-1 -key C:/Users/sampleuser/Downloads/service-account-key.json
-
(Optional) Delete the service account
keyfile.All required information is copied and encrypted from this file during the creation of the backend CA.
-
In a command prompt window, navigate to the CA connector install location.
-
Create a new backend.
sectigo-cbcs.exe backend add -name <backend_name> -type msca -server <server> -ca <ca_common_name>The command options are outlined in the following table.
Option Description nameThe name used to represent the CA backend.
typeThe type of CA that is being connected to.
For Microsoft CA the value must be
msca.serverThe hostname of the server hosting the Microsoft CA.
caThe CA’s Common Name.
Sample commandsectigo-cbcs.exe backend add -name MSCA1 -type msca -server SectigoTestCA -ca local-SectigoTestCA-CA
-
Generate the Enrollment Agent (EA) key pair and enroll the Enrollment Agent Certificate.
sectigo-cbcs.exe backend msca enroll-agent-cert -name <backend_name> -ca <ca_common_name>You can specify an alternative EA template by adding the -template <your_ea_name>option.
|
You can view additional CLI commands with the sectigo-cbcs help |
Restore a CA connector
CA Connectors that are offline for over 30 days may lose the ability to connect to SCM. In most cases, this connectivity can be restored by doing the following:
-
Log in to SCM.
-
Navigate to .
-
Select the connector to be restored, and click Restore.
-
Click OK.
-
Save the displayed token, and close the Restore Connector dialog.
-
In a command prompt window, navigate to the CA connector install location.
-
Restore the connector.
register -token <registration_token> -force
Update a CA connector
-
Log in to SCM.
-
From the left-hand menu, select About.
-
Click the Download CA Connector icon.
-
(Optional) If required, move the
SectigoCBCS.msifile to the CA connector machine. -
Right-click
SectigoCBCS.msiand click Install.The package automatically recognizes that there’s an existing version of the CA connector and initiates an update instead of a new install.
-
Read the EULA, select I accept the terms in the License Agreement, and click Next.
-
(Optional) Specify an installation location.
-
Click Next, Install, and Close.
-
In SCM, navigate to the CA Connectors page and verify that the connector is connected and showing the correct version.
Uninstall a CA connector
-
In Windows, navigate to .
-
Search for Sectigo.
-
Select the Sectigo CA Backend Connector and click Uninstall.
-
(Optional) Delete the files and logs associated with the CA connector.
-
Navigate to
C:\ProgramData\Sectigo Limited. -
Delete the
SectigoCBCSfolder.This cannot be undone. Only delete this folder if you want to completely remove all files and logs related to the CA connector.
-
-
In SCM, navigate to .
-
Select the connector you want to delete.
-
Click the Delete icon.
-
Click Delete.